VTAF TEFLON UPGRADE KIT INSTRUCTIONS
About The VTAF™ Teflon Upgrade
The VTAF (Vertical Tracking Angle on the Fly) improves tonearm sonic performance by damping vibrations originating in the phono cartridge and carried by the tonearm. The VTAF also allows smooth and easy adjustment of VTA with the record in play.
Congratulations on your decision to install the VTAF Teflon Upgrade Kit. The VTAF Teflon Upgrade improves the already excellent sonic performance of the VTAF, and reduces VTA adjuster wheel friction, making the wheel smoother and easier to turn.
Benefits of the VTAF™ Teflon Upgrade
Reduced adjuster wheel friction makes adjustment on the fly even easier.
Improved isolation adds to the remarkable sonic benefits of the VTAF.
Photos are included following the text. Get the photos out now for review while doing the installation.
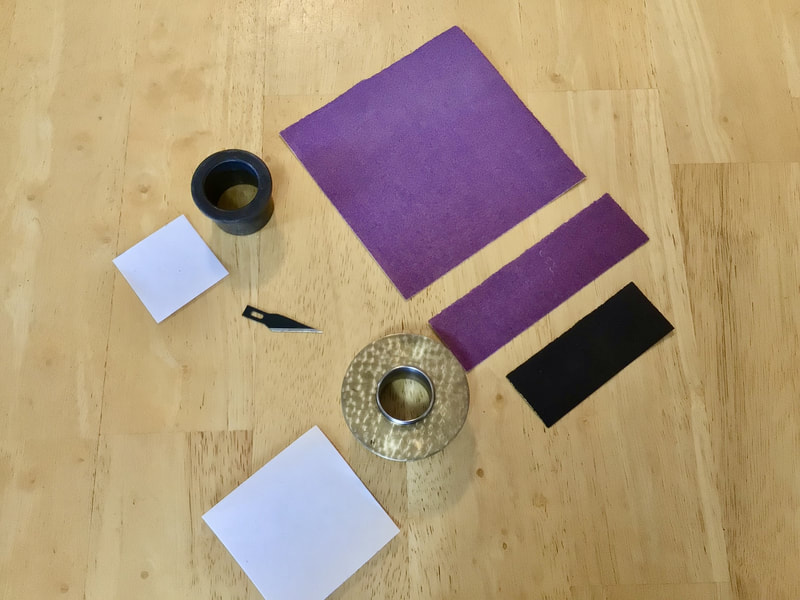
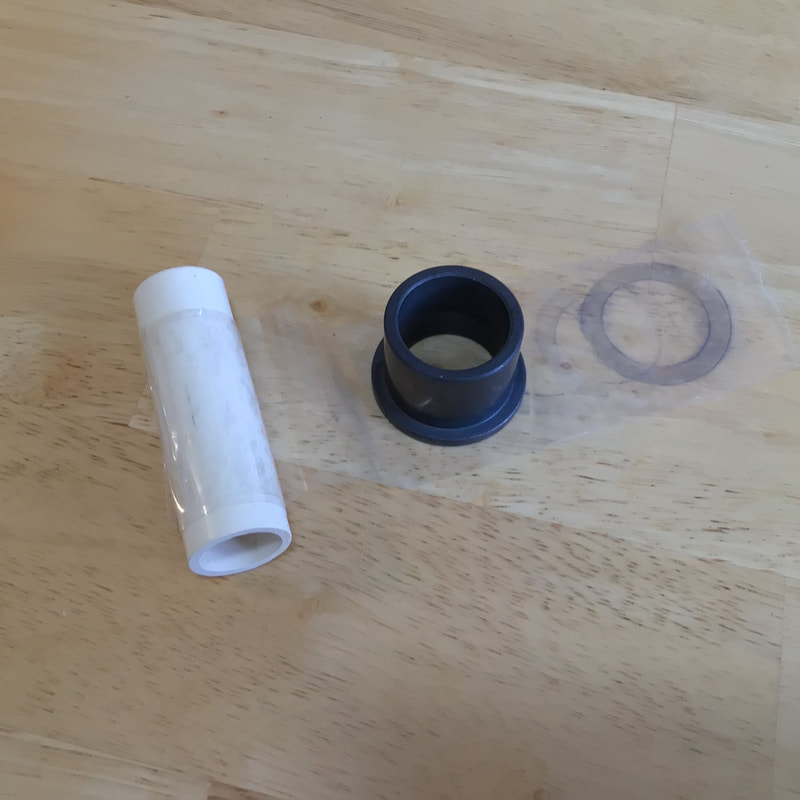
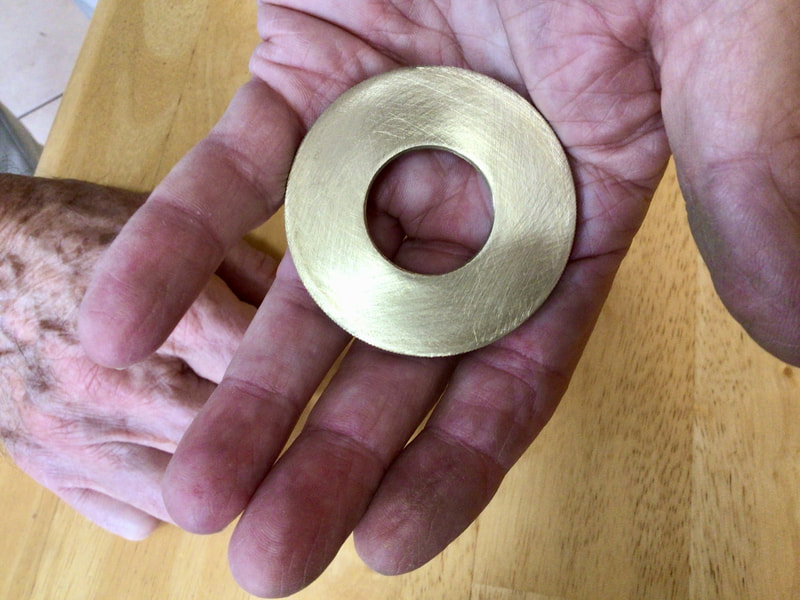
See Photos 1 and 2 which show the items included in the kit, as listed below:
Large self-adhesive Teflon square for the bottom of the VTAF adjuster wheel.
2 each (one spare).
Small self-adhesive Teflon square for the top of the top flange of the VTAF bronze bushing, 2 each (one spare).
Four each (2 required, 2 spares) 1/4" diameter self-adhesive Teflon dots for guide post contact points.
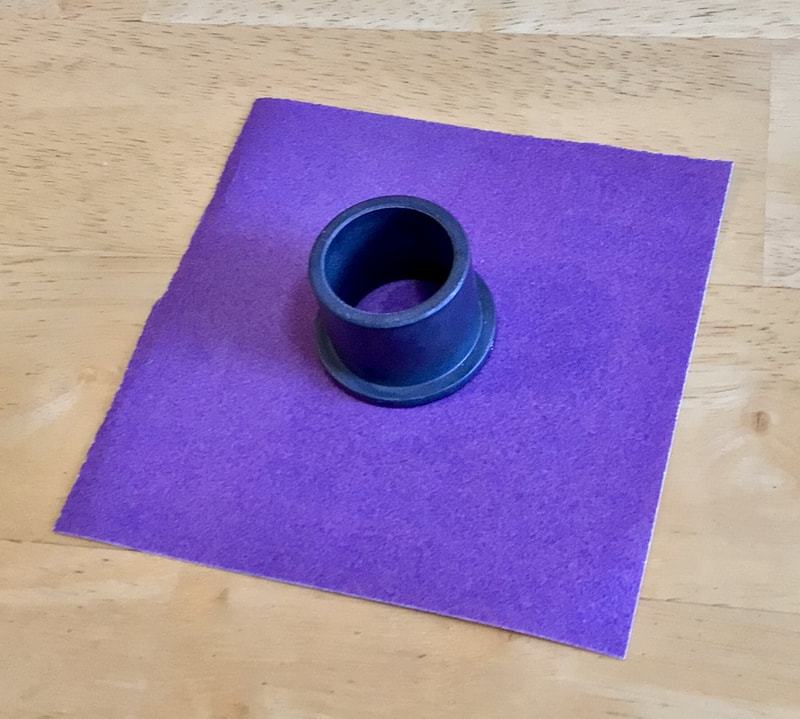
Square of 220 grit abrasive paper (use for removal of oxide from top surface of bronze bushing).
Strip of 220 grit abrasive paper (use for removal of oxide from bottom surface of adjuster wheel).
Small rectangle of 320 grit abrasive paper (use to clean outer edges of applied Teflon sheet).
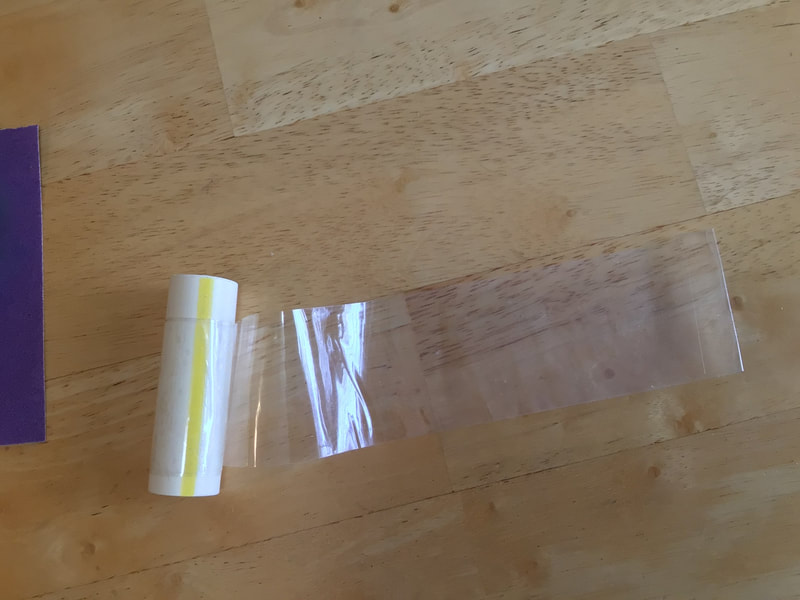
Shipping tape wrapped on a short length of PVC pipe.
Two alcohol wipes
One Type 11 Xacto blade.
Shipping tape rolled on PVC spool
Teflon installation instructions
Instructions for installing the VTAF™ Teflon Upgrade Kit
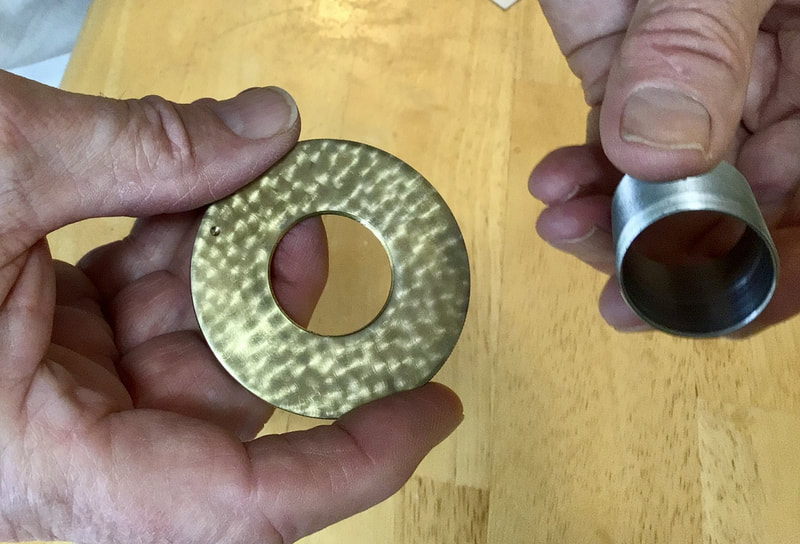
If the VTAF has been installed, Remove the VTAF adjuster wheel and the VTAF Bronze Bushing before following the steps below:
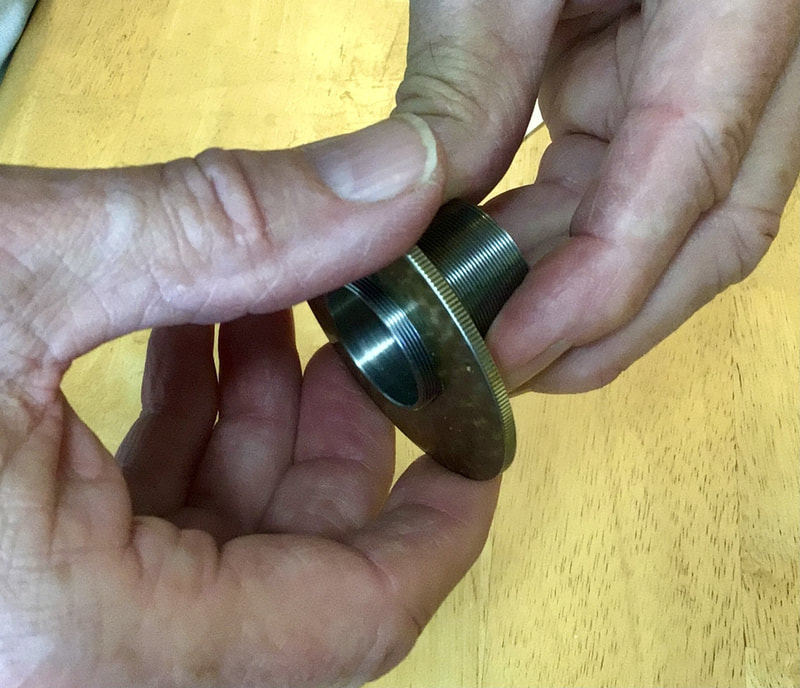
See Photos 3 and 4: Unscrew the VTAF Adjuster Wheel from the VTAF Adjuster Screw.
To protect the lacquered appearance surface of the adjuster wheel during the steps below, avoid laying the appearance surface on a support surface.
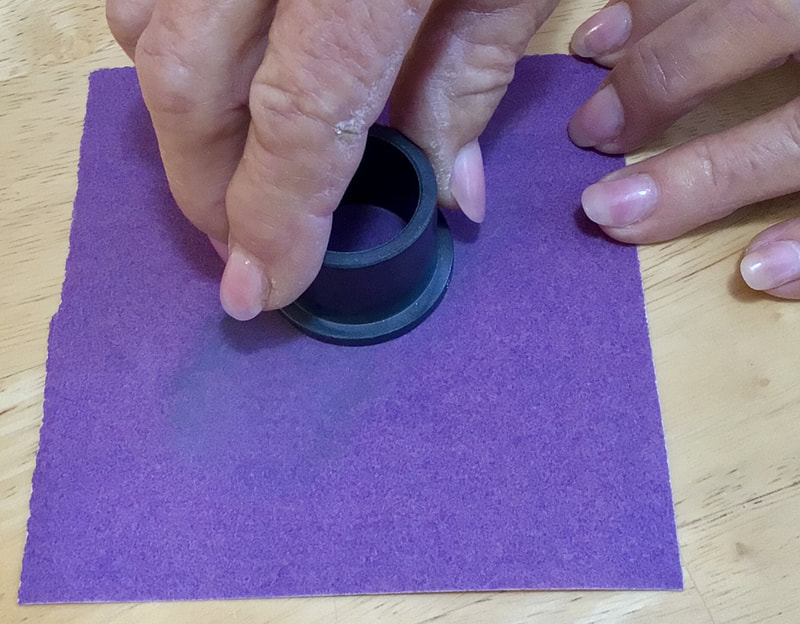
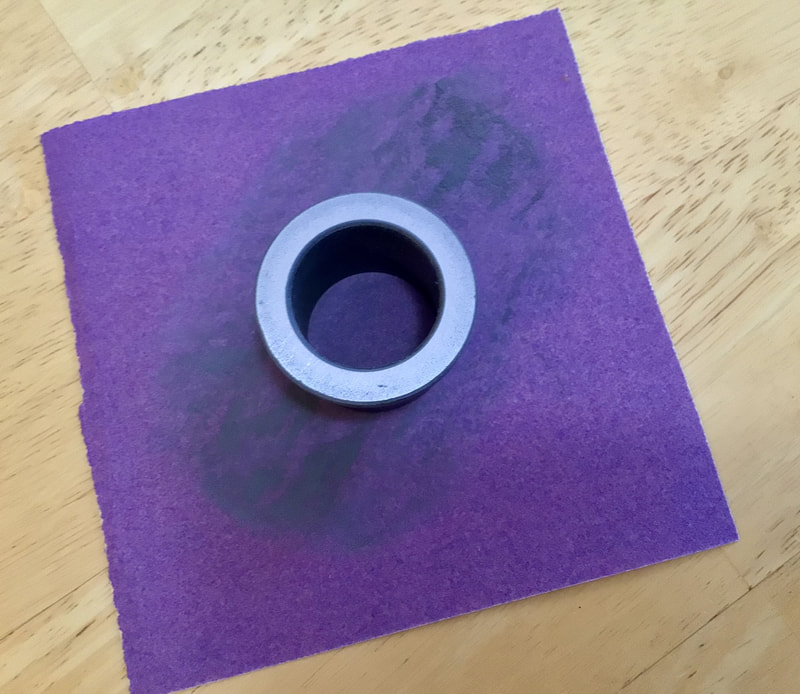
See Photos 5, 6, and 7: Self adhesive Teflon film will not adhere to an oxidized surface. Use the provided square of 220 grit abrasive paper to remove the oxide layer from the top of the bushing flange. Do this by laying the square of abrasive paper on a firm flat surface with the abrasive facing up. Place the flange of the bushing face down onto the abrasive paper. Keeping the flange face flat against the abrasive, rub the flange top against the abrasive to remove the oxide layer. Continue until the flange top is bright.
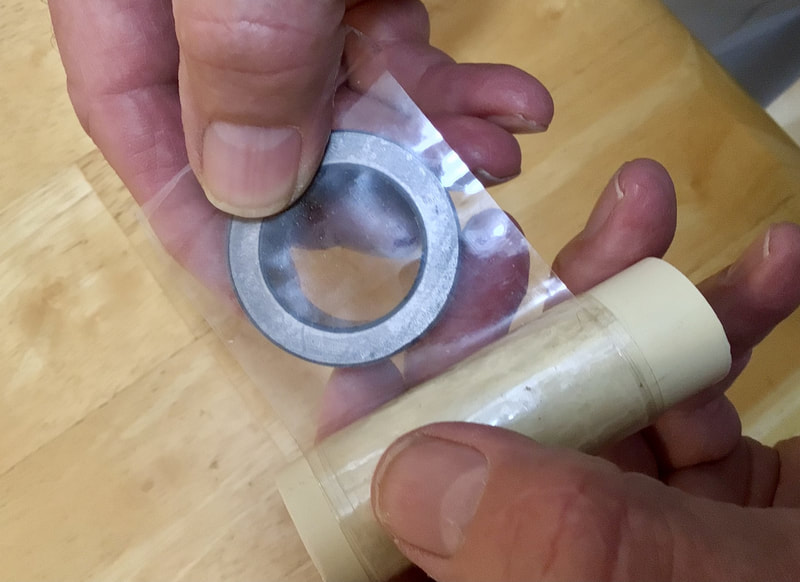
See Photos 8 and 9: A length of shipping tape rolled on PVC spool has been provided. Unroll the tape and use the sticky side to remove all dust from the wheel bottom surface and the bushing top surface. Repeatedly apply and remove the tape until the surfaces are dust free.
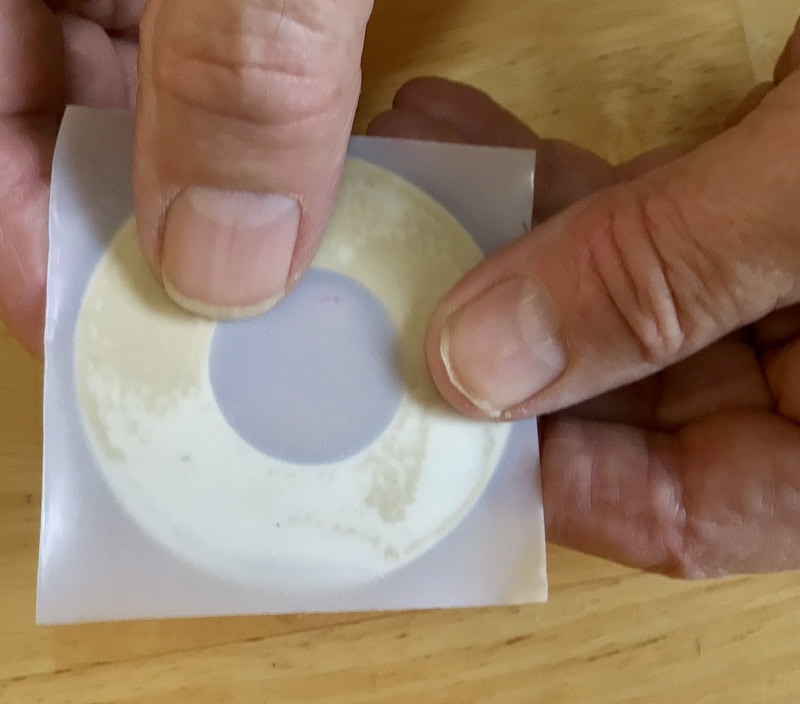
Two large and two small squares of self-adhesive Teflon film have been provided. One of each is needed. The other two squares are spares which probably will not be needed.
Remove the Number 11 Xacto blade from the card on which it was shipped.
HANDLE THE Xacto BLADE CAREFULLY! IT IS SHARP! WHEN FINISHED WITH THE INSTALLATION, RETURN THE BLADE TO THE CARD IT WAS SHIPPED WITH ANDDISPOSE OF OR STORE THE XACTO BLADE SAFELY.
Adhesive which adheres to the Xacto blade may interfere with the cutting action of the blade. If this problem occurs, clean the blade with one of the included alcohol wipes.
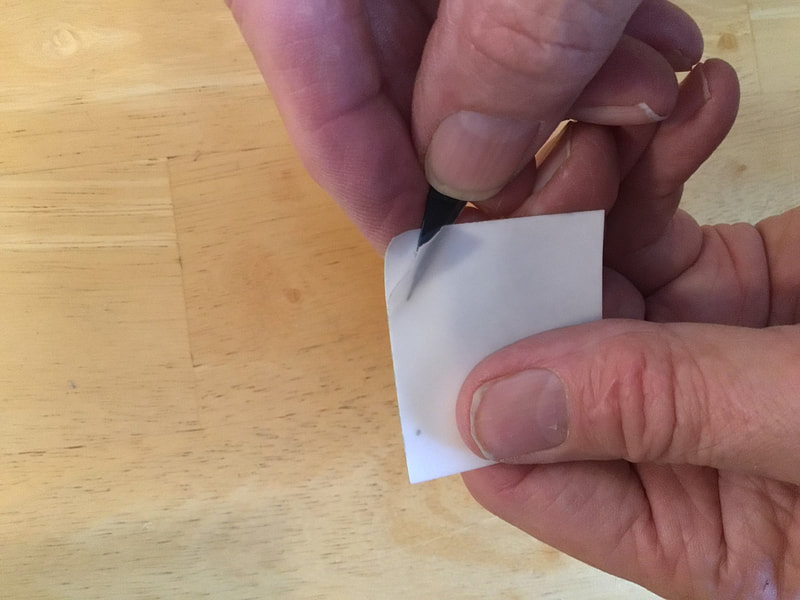
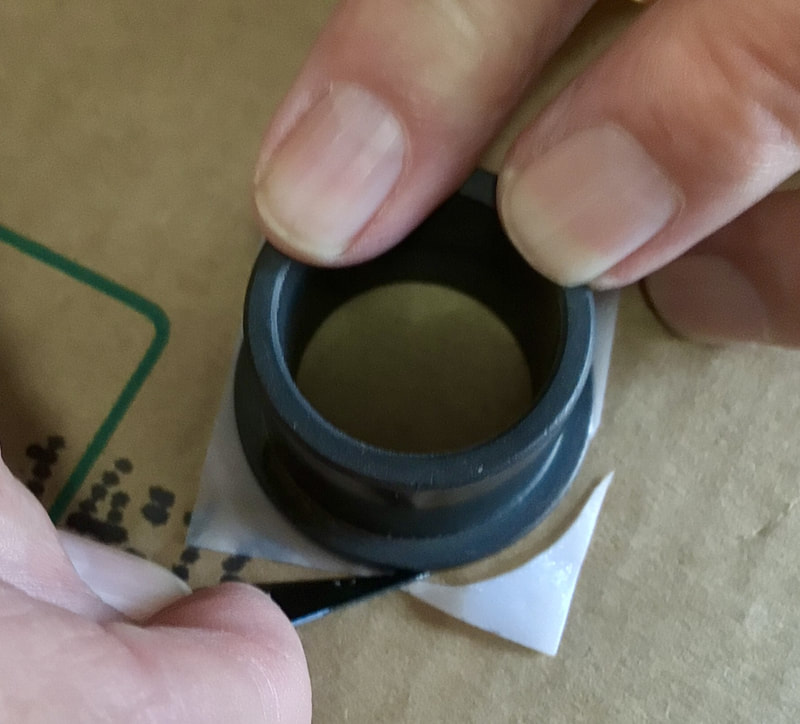
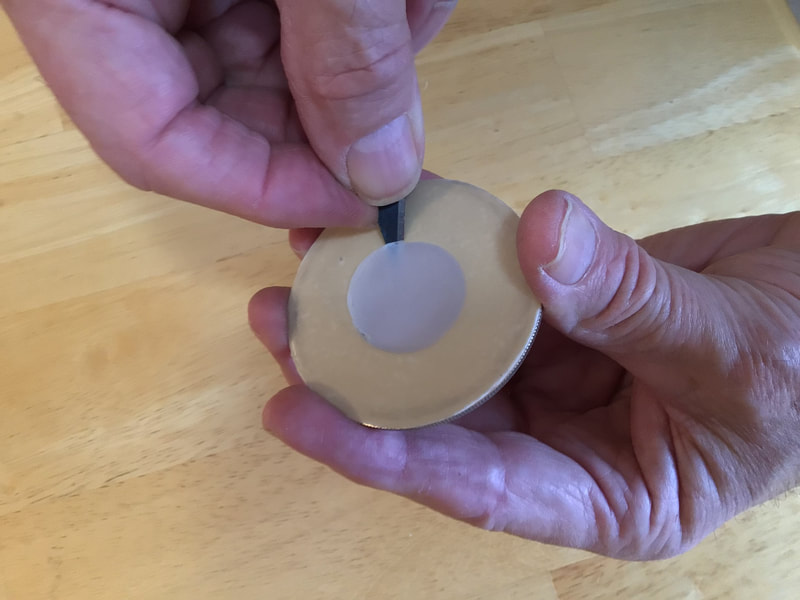
See Photo 10: Work the knife point of the blade under the backing sheet of the small self-adhesive Teflon square. Peel off and discard the backing sheet. Avoid unintended contact of the adhesive with other objects.
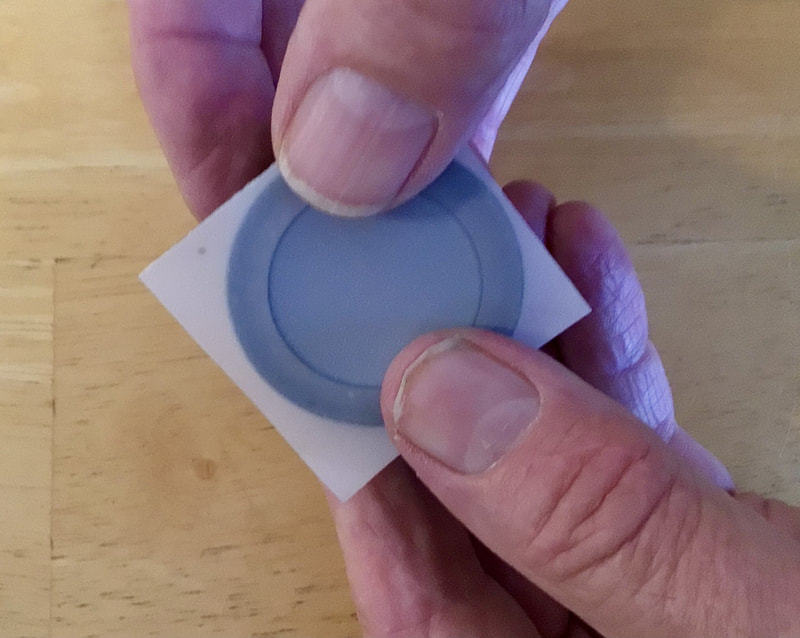
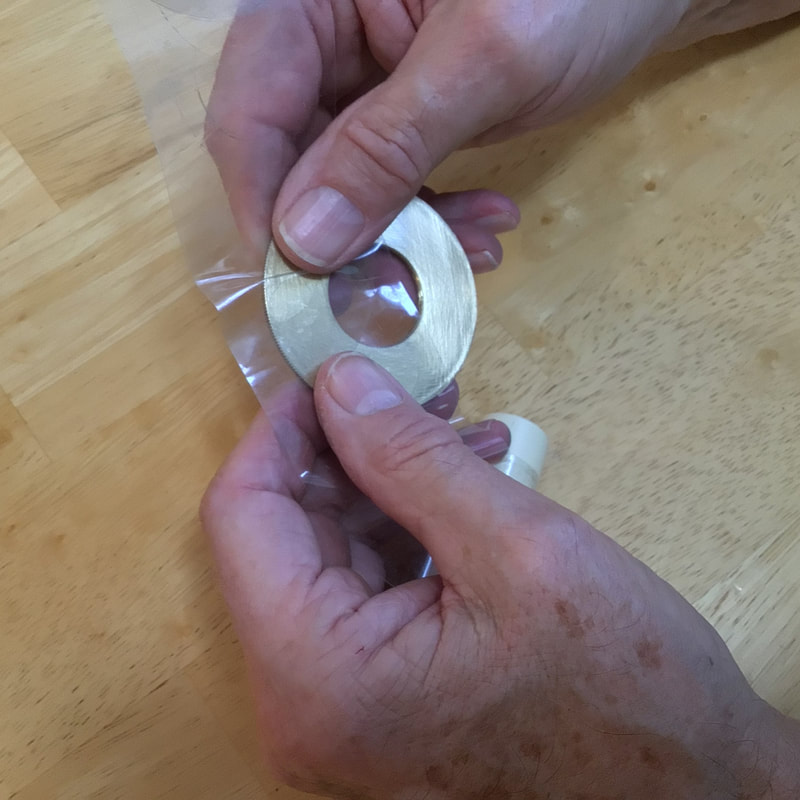
See Photo 11: Apply the sticky side of the small Teflon square to the top surface of the VTAF Bronze Bushing. Rub the Teflon with the ball of your thumb to remove trapped air bubbles. Continue to rub with the ball of your thumb until the Teflon warms up, the bubbles are forced out, and the Teflon film is tightly adherent to the top surface of the bushing.
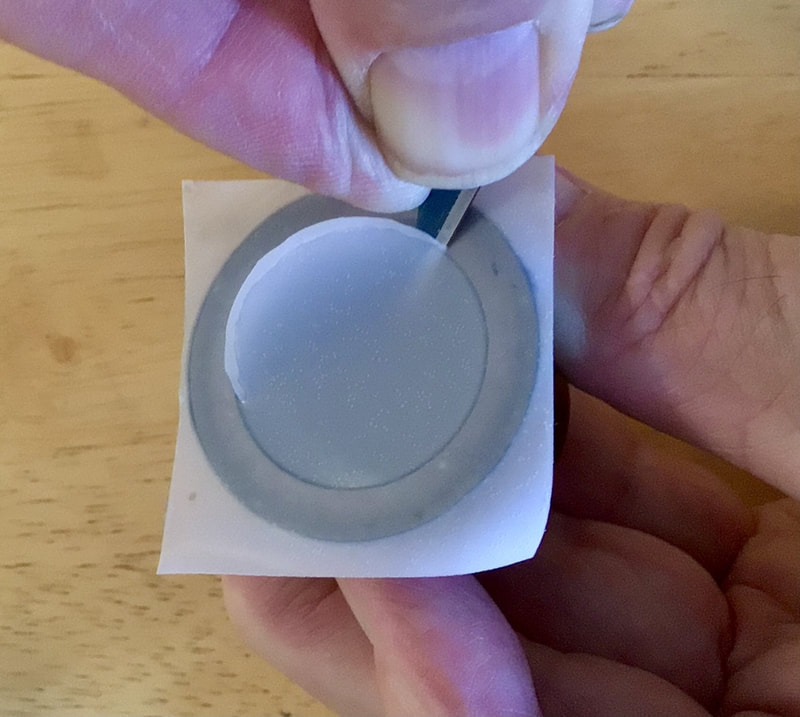
See Photo 12: Use the Xacto knife blade to trim the Teflon layer out of the hole in the VTAF Bronze Bushing. Hold the blade at about a 30 degree angle to the Teflon surface to create a bevel cut, so that the teflon will not lap over into the bore of the bushing. When the cut is complete, check that no teflon protrudes into the bore of the bushing. Repeat the cut as necessary to remove all Teflon which might overlap the bore of the bushing.
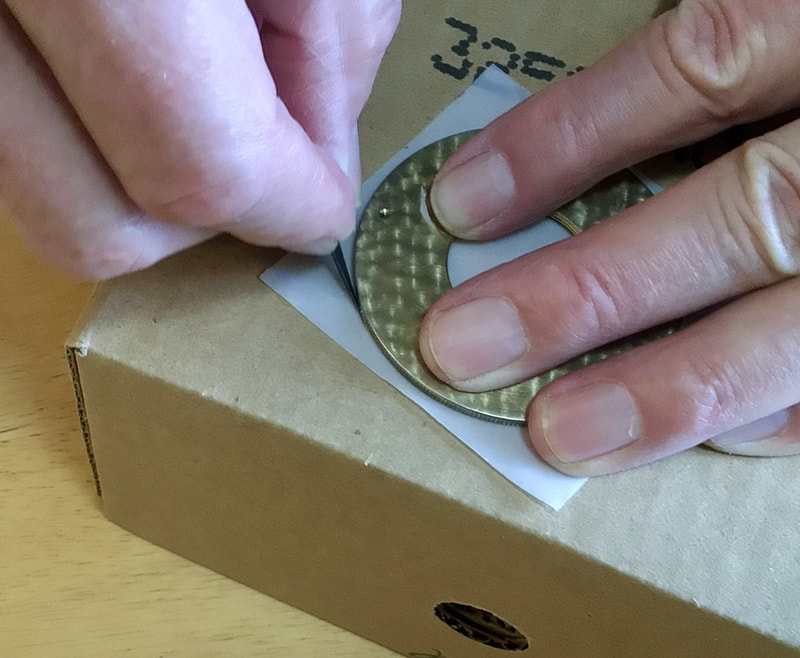
See Photo 13: Place the bushing flange down on a piece of cardboard taken from the Teflon Upgrade shipping box. Holding the Xacto knife point at a slight angle, trim the Teflon around the outside of the bushing.
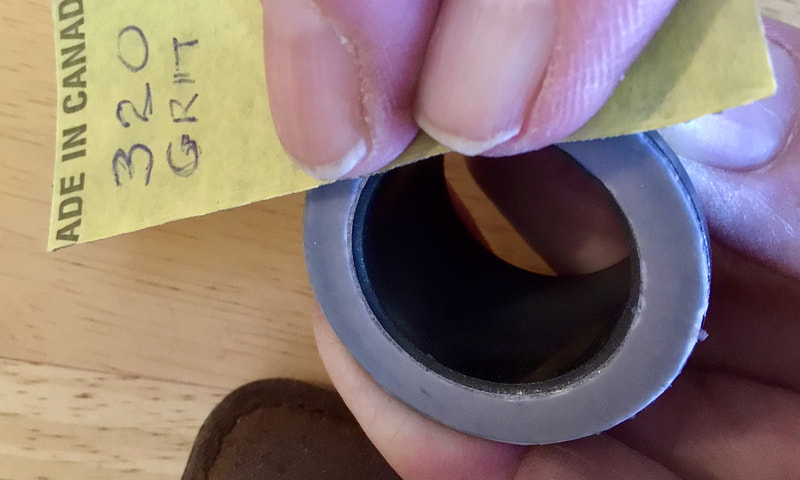
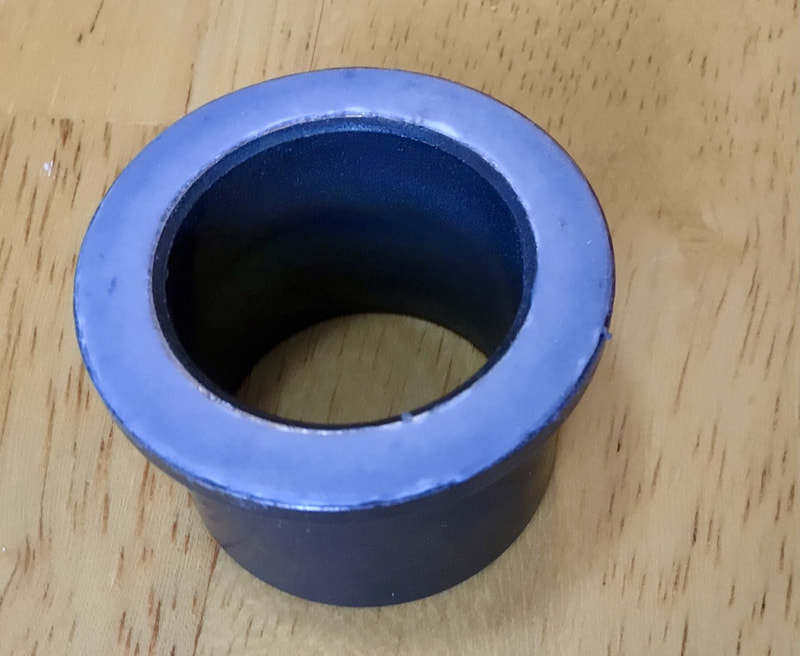
See Photos 14 and 15: Use the 320 Grit abrasive paper, held at a 45 degree angle, to smooth the outer edge of the bushing Teflon. The completed installation of the Teflon on the top of the bushing flange is seen in Photo 15.
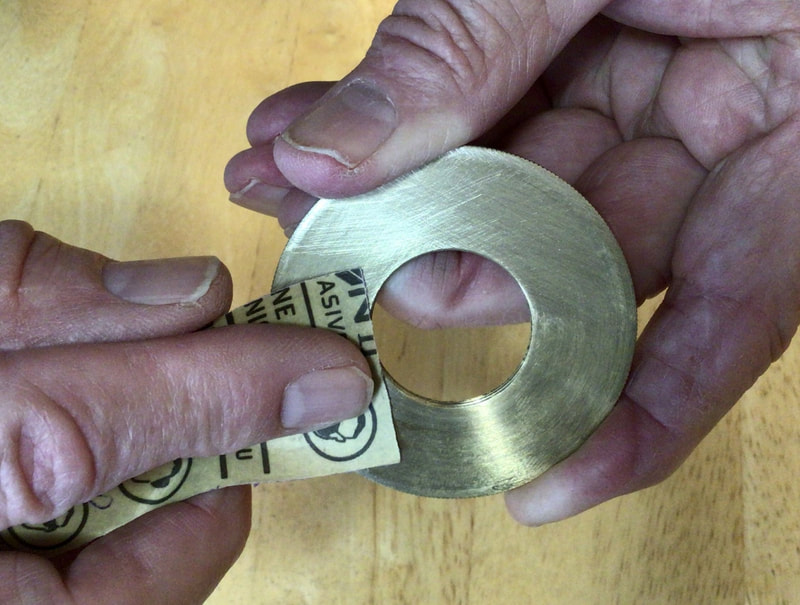
See Photo 16: Use the provided strip of 220 grit abrasive paper to remove the oxide layer from the bottom surface (non-appearance surface) of the adjuster wheel. Hold the adjuster wheel in one hand. Use the abrasive paper wrapped around the index finger of the other hand to scrub the oxide away. Continue scrubbing, a section of the wheel at a time, until the surface is bright.
See Photos 17 and 18: Clean the bottom surface of the adjuster wheel by pressing the surface repeatedly into fresh sections of the shipping tape adhesive.
See Photo 10 Again: Work the knife point of the blade under the backing sheet of the large self-adhesive Teflon square, and peel off and discard the backing sheet. Avoid unintended contact of the adhesive with other objects. This is similar to how the backing sheet of the bushing Teflon was removed.
See Photo 19: Apply the sticky side of the large self-adhesive Teflon square to the bottom surface of the adjuster wheel. Rub the Teflon with the ball of your thumb to remove any trapped air bubbles. Continue to rub with the ball of your thumb until the Teflon warms up, the bubbles are forced out, and the Teflon is tightly adherent to the bottom surface of the adjuster wheel.
See Photo 20: Use the Xacto knife blade to trim the Teflon out of the hole in the VTAF Adjuster Wheel. Hold the blade at a 30 degree angle to the Teflon surface to create a bevel cut, so that the Teflon will not lap over into the hole of the adjuster wheel. When the cut is complete, check that no Teflon protrudes into the hole of the VTAF Adjuster Wheel. Repeat the cut as necessary to remove all Teflon which might overhang the hole of the adjuster wheel.
See Photo 21: Use the Xacto knife blade to trim the Teflon around the knurled edge of the VTAF Adjuster Wheel. Hold the knife at a 30 degree angle to the Teflon surface to keep the Teflon from showing outside the knurled perimeter of the wheel. Use your thumb and forefinger to remove any slivers of Teflon and any adhesive that may have gathered at the cut edges of the self-adhesive Teflon.
Photo 14 Again: Use the 320 Grit abrasive paper, held at a 45 degree angle, to smooth the outer edge of the adjuster wheel Teflon. This is similar to what was done to smooth the bushing Teflon outer edge.
Assemble the VTAF Adjuster Wheel onto the VTAF Adjuster Screw. Spin the wheel on the screw to verify that adhesive and/or Teflon have not fouled the threads of the screw. The wheel must spin freely for proper VTAF operation. If the wheel has any stalling tendency, spin the wheel back and forth until the threads are cleared.
Install the VTAF according to the VTAF installation instructions.
Adjust the VTAF Guide Assembly to determine the points of contact of the VTAF Guideposts with the extension of the tone arm pedestal guided by the posts.
Remove the backing from one of the adhesive dots. Lift the tone arm assembly straight up and place a self-adhesive Teflon dot on the arm pedestal extension at the point where the guidepost will make contact.
Repeat step 16 for the remaining guidepost.
Remember to store or dispose of the Xacto blade safely. The blade is dangerous.
This concludes the VTAF Teflon Upgrade Installation Instructions.
Photos Below:
Windows: Hover cursor over photo for caption. Mac: Click for enlarged photo with caption.

